Friday, February 26, 2010

Come on, you know you want some...

Looking for a sugar rush? Look no further!


Today we made some rice krispie treats as an end-of-the-week treat, only I made a sinister move and substituted sugar-loaded Fruity Pebbles for the traditional Rice Krispies.


Honestly, I was going for the effect brought out by the color of the Fruity Pebbles, but WOW!, it was a real sugar shock compared to the ordinary mild-mannered snap*crackle*pop variety. Seriously, your first reaction will be WOW!, followed by uncontrollable chills as the sugar is released into your system.


Here's the recipe (since it's not printed on every Rice Krispie cereal box like it used to be):

1/4 cup butter or margarine
5 1/2 cups mini marshmallows
5 1/2 cups crisp rice cereal

(I usually use less cereal than is required because I like more gooey than crunchy treats.)


Prepare a cookie sheet with wax paper and butter the surface. Pour the butter/margarine and marshmallows into a microwave proof bowl. Microwave for 1 to 2 minutes in 40 second intervals. When the marshmallows have puffed up, they are ready. Add in the cereal one cup at a time.


Spread the mixture with a (buttered) spatula until the mixture lays flat. If you have the patience to let the mixture set up in the refirgerator, be sure to cover it with plastic wrap first so it doesn't dry out.


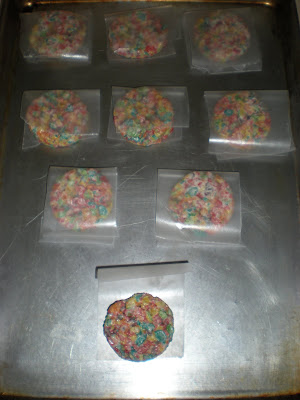
I like to cut my treats into circles with a 2-inch biscuit cutter, and then insert a popsicle stick to help kiddie hands stay (relatively) sticky-free. Another method to ward off stickiness, or for bake sale distribution at a backyard barbecue, is to wrap each treat in a small rectangle of wax paper that kids (or adults) can hold while they eat.


Because square treats are so streamlined, you must decide what to do with the scraps left if you cut circles. You can either scarf them down surreptitiously before the kids see you, or you can gather the scraps together using the wax paper or the buttered spatula to make a new flattened mass and recut. Today's batch yielded 15 treats (not all seen here, of course, because we had to try them).

If you do plan on making this version, just be sure to have a toothbrush nearby. And maybe a trampoline to burn off the sugar overload, too.

Wednesday, February 17, 2010

You Gotta Try This

If you have these...
and these,

then you can make this in just one hour!

My Mother-in-Law's Brown Bread. While she did not create this recipe, she introduced me to it two years ago. It is very good straight from the oven, but it is DELICIOUS when you toast a slice of it the next morning and top it with a little butter. The brown sugar in it gets a little nutty when it toasts. Mmmm, mmm, mmm.
Found in The Beaufort Gazette,
Bridie Meyers says that she grew up eating this bread almost every day in County Mayo, Ireland. She makes a lot of it each year for the Christmas bake sale at the Irish American Heritage Center.

Whole Wheat Bread
2 cups all-purpose flour
2 cups whole wheat flour
½ cup brown sugar, packed
1 tsp baking soda
1 tsp baking powder
¼ tsp salt
1 egg, lightly beaten
1 ½ cups buttermilk
¼ cup butter (1/2 stick), melted

Heat oven to 375 degrees. Mix together the flours and other dry ingredients in a large bowl. Stir in the egg, buttermilk and butter. Mix with a wooden spoon just until the dough forms a ball.

Press into a greased 9-inch round pie dish. Bake until deep brown, about 50 minutes. Cool on wire rack.
My advice is not to slice the bread into wedges, like a pie. Make long slices starting from the middle and then continue out towards the ends. And don't forget to save some to toast in the morning! You will not be disappointed. I promise.

Tuesday, February 16, 2010

Snow Prayers Answered

We had a great dose of snow last Friday. Big Fat Flakes of February Snow! It was great watching it come down and create a blanket of white.

M got off the school bus and got right down to snow business.

B tried her best at catching snowflakes on her tongue without getting pelted in the eyes.

Saturday morning was sunny enough, but not too warm to melt everything instantly, as it so often does following a snowstorm in the South. The neighborhood kids (and adults) were out in full effect taking advantage if the sledding opportunity. Sleds and saucers are impossible to find (and impractical to own) in the South. Only one out of 6 families had a proper sled (thanks for sharing, Patty!), so that meant the rest of us were dragging out every other possible sledding device we could conjure - slick cardboard boxes, baking trays, and lids from giant plastic tubs. What a blast!


And what better way to top off a snowy play day? A blazing fire and hot cocoa with marshmallows, of course!!

Hope your February is just as sweet!

Tuesday, February 9, 2010

Valentine Crafts Under $1

And the crafting continues...


I cut a bunch of heart stamps from mega-pack of sponges purchased at Dollar Tree. The girls loved making their own designs with them.


They even enjoyed cutting up the scrap pieces of sponge. A different texture for them to cut through, so a hand skill as well!


Another fun and nearly free painting idea, brought to my attention by Kim over at 4 Krazy Kings, is to take toilet paper tubes and bend them to make a heart shape, then use as a stamper. She has TONS of crafts to make with toilet paper tubes. Check 'em out: http://4crazykings.blogspot.com/2010/02/weekend-recap-making-crayons-crazy.html


To jazz up the newly painted hearts, why not fill them in with some Valentine stickers like my 4- year-old did?

Monday, February 8, 2010

Today's Inspiration: Salt Dough


Too often I browse the internet and file away clever idea after clever idea and never take the time to actually take a stab at doing them myself.

"Today's Inspiration" is going to be an ongoing segment in which I can REJOICE in the fact that I actually took an idea I found on the blogosphere and turned it into reality.

Today, it was Salt Dough Hearts. I have been "planning" on making salt dough ornaments year after year after year. Well, thanks to a posting of a cute bunch of kid-crafted salt dough hearts strung with butcher's twine here http://thelongthread.com/?p=5678, I was inspired to make my own.

Very simple recipe: 1 cup flour, 1/2 cup salt, and 1/2 cup warm water. Knead together and flatten with a rolling pin, then cut out into any shape you like. (Check out the toast imprinter I remembered was in a utensil drawer before I ran out of dough!)


The nice part about rolling the salt dough is that unlike pie dough, you don't need to spread any flour on your board, therefore less messy!

Bake in a 200 degree oven for about two hours. If any piece is very large, you may need to flip it over at the end, and allow it to air dry in the oven once it has been turned off. Also, I used parchment under the dough hearts, but I'm sure you could use foil just as well.

My batch made over fifty 1 inch hearts and two larger hearts. Try it!!


M said, "I like the lacy ones." B said, " I want mine to look fabulous."

Sunday, February 7, 2010

Valentine's Only One Week Away

I really enjoy Valentine's Day. A holiday centered around hearts, love, hugs, snuggles and CHOCOLATE? Come on, what's not to love?

I have hosted a Valentine's Preschooler Craft Party at my church for the past 2 years now, and thusly (yeah, I said thusly) I have a stash of Valentine craft supplies that even Cupid would envy. My original intention was to share and post 14 different Valentine's day ideas from Feb. 1-14 to jump start my blogging again, but while preparing for this year's party, I fell off the blog bandwagon again. But now I'm back!

Here's a simple 3 paneled Valentine banner I made last year. It was inspired by a Halloween "BOO" banner I had seen in a scrapbooking magazine in the Fall of '08, decked out with tons of Halloween embellishments. With time and simplicity as my two driving factors, this version is pretty tame, but you could certainly embellish to your "heart's content".

Basically, I started with 3 pieces of the darkest color paper and cut them into a pennant shape (pointed at the bottom). Then I printed "We" and "You" on a medium shade paper, and printed "Love" on the lightest shade. The three medium shade pieces were also cut to mimic the dark pennant shape, but narrower on every side, and trimmed with pinking shears at the top for a little extra contast. The lightest shade with "Love" printed on it was cut into the shape of a heart, old school style, b/c I am cw/occm (translation: because I am currently without a Cricut machine), for the center panel.

The real character of the banner comes from the 3 flowers at the bottom of the center panel. I started by gluing 3 rickrack and ribbon "stems", then attaching a 4 petal flower to the top of each one. Each flower is made of 5 hand-punched hearts (2 inches, I believe) that have been creased in half (for dimension), pin-hole punched at the bottom, and attached with a simple brad. Note: Attaching the flowers must be done before gluing the center panel to the dark pennant back or else the brad prongs will show thru the back of the piece.

Finally, I used 3-D stickers at the corners of the outer panels, and strung the 3 panels together with coordinating ribbons for hanging.

This banner was a gift for my mom, who taught me that a homemade gift is by far the best way to show someone you love them. I love you, mom.