Showing posts with label Popsicle Stix. Show all posts

Monday, February 28, 2011

Seuss-inspired Daisy Gear

You've read 'Green Eggs and Ham' and 'The Cat in the Hat', but can you name another even rarer than that?

We are certainly BIG fans of Dr. Seuss in this household,
but we share a special fondness for this little-known work written by Theodor Seuss Geisel: 
Daisy-Head Mayzie was written by Dr. Seuss in the 1960s, yet it was published posthumously. It was made into an animated special for Hanna Barbera cartoons back in 1995, and as I just discovered on Wikipedia, is being made into a Disney/Pixar film in 3D. Wow!

So, how would you like to be just like Mayzie and have your very own daisy sprouting up from your noggin?

It's simple! Gather a sheet of white poster board, some yellow cardstock, a green foam sheet, popsicle sticks, and white daisy-shaped die cuts. (I used a set of daisy paper coasters from the Martha Stewart collection.) Other necessary tools: scissors, scallop paper punch, packing tape, double sided tape, tacky glue, exacto knife, stapler.

1. Start by cutting bands from the narrow end of the poster board, close to 2" tall. This band should be wide enough to encircle the head of any child.


2. Use the scallop punch to cut two yellow card stock centers of the daisy, one for each side of the daisy. Use a thin strip of packing tape to attach the popsicle stick to the daisy base, then use double-sided tape to adhere the centers, with one center covering the top of the popsicle stick.

3. Cut a leaf shape for each daisy from the green foam. Use the exacto knife to cut a slit in the widest part of the leaf. Slide the leaf onto the popsicle.


4. Put a few drops of tacky glue at the base of the popsicle stick and press onto the poster board band. Reinforce with packing tape.


5. When all the daisy "stems" are attached to the bands, the bands can be sized and stapled around the heads of the children you are going to read Daisy-Head Mayzie to. Take a photo of their happy faces, then send it to me!


I hope you have an opportuny to pick up your favorite Dr. Seuss book and participate in Read Across America Day on March 2nd.

Friday, February 26, 2010

Come on, you know you want some...

Looking for a sugar rush? Look no further!


Today we made some rice krispie treats as an end-of-the-week treat, only I made a sinister move and substituted sugar-loaded Fruity Pebbles for the traditional Rice Krispies.


Honestly, I was going for the effect brought out by the color of the Fruity Pebbles, but WOW!, it was a real sugar shock compared to the ordinary mild-mannered snap*crackle*pop variety. Seriously, your first reaction will be WOW!, followed by uncontrollable chills as the sugar is released into your system.


Here's the recipe (since it's not printed on every Rice Krispie cereal box like it used to be):

1/4 cup butter or margarine
5 1/2 cups mini marshmallows
5 1/2 cups crisp rice cereal

(I usually use less cereal than is required because I like more gooey than crunchy treats.)


Prepare a cookie sheet with wax paper and butter the surface. Pour the butter/margarine and marshmallows into a microwave proof bowl. Microwave for 1 to 2 minutes in 40 second intervals. When the marshmallows have puffed up, they are ready. Add in the cereal one cup at a time.


Spread the mixture with a (buttered) spatula until the mixture lays flat. If you have the patience to let the mixture set up in the refirgerator, be sure to cover it with plastic wrap first so it doesn't dry out.


I like to cut my treats into circles with a 2-inch biscuit cutter, and then insert a popsicle stick to help kiddie hands stay (relatively) sticky-free. Another method to ward off stickiness, or for bake sale distribution at a backyard barbecue, is to wrap each treat in a small rectangle of wax paper that kids (or adults) can hold while they eat.
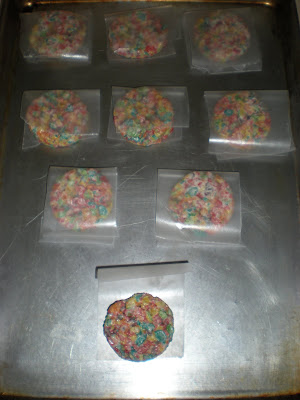

Because square treats are so streamlined, you must decide what to do with the scraps left if you cut circles. You can either scarf them down surreptitiously before the kids see you, or you can gather the scraps together using the wax paper or the buttered spatula to make a new flattened mass and recut. Today's batch yielded 15 treats (not all seen here, of course, because we had to try them).

If you do plan on making this version, just be sure to have a toothbrush nearby. And maybe a trampoline to burn off the sugar overload, too.