Showing posts with label Do it for a Dollar. Show all posts

Saturday, April 23, 2011

Today's Inspiration IV: Apothecary-Style Candy Dish

Lots of apothecary-style candy dishes were prevalent leading up to Halloween last year, most notable the simple-as-can-be tutorial on Dollar Store Crafts. I'm not exactly what you would call "speedy", but I consider getting one assembled before a year has passed pretty good for me. Easter candy tastes just as good! Supplies: Covered Candy Dish, Candlestick and powerful glue.

Ready...

Set...

Fill!
I know they're not fancy but for just about $2 a piece, they are perfect. So, how many days before they're empty?!

Monday, June 28, 2010

July 4th Paper Rosettes

I'm always looking for a diversion when I'm in the passsenger seat during a long road trip. Sometimes I browse through a stack of magazines. Last year, I made these pinwheels in the car on the way to our Fourth of July beach destination.

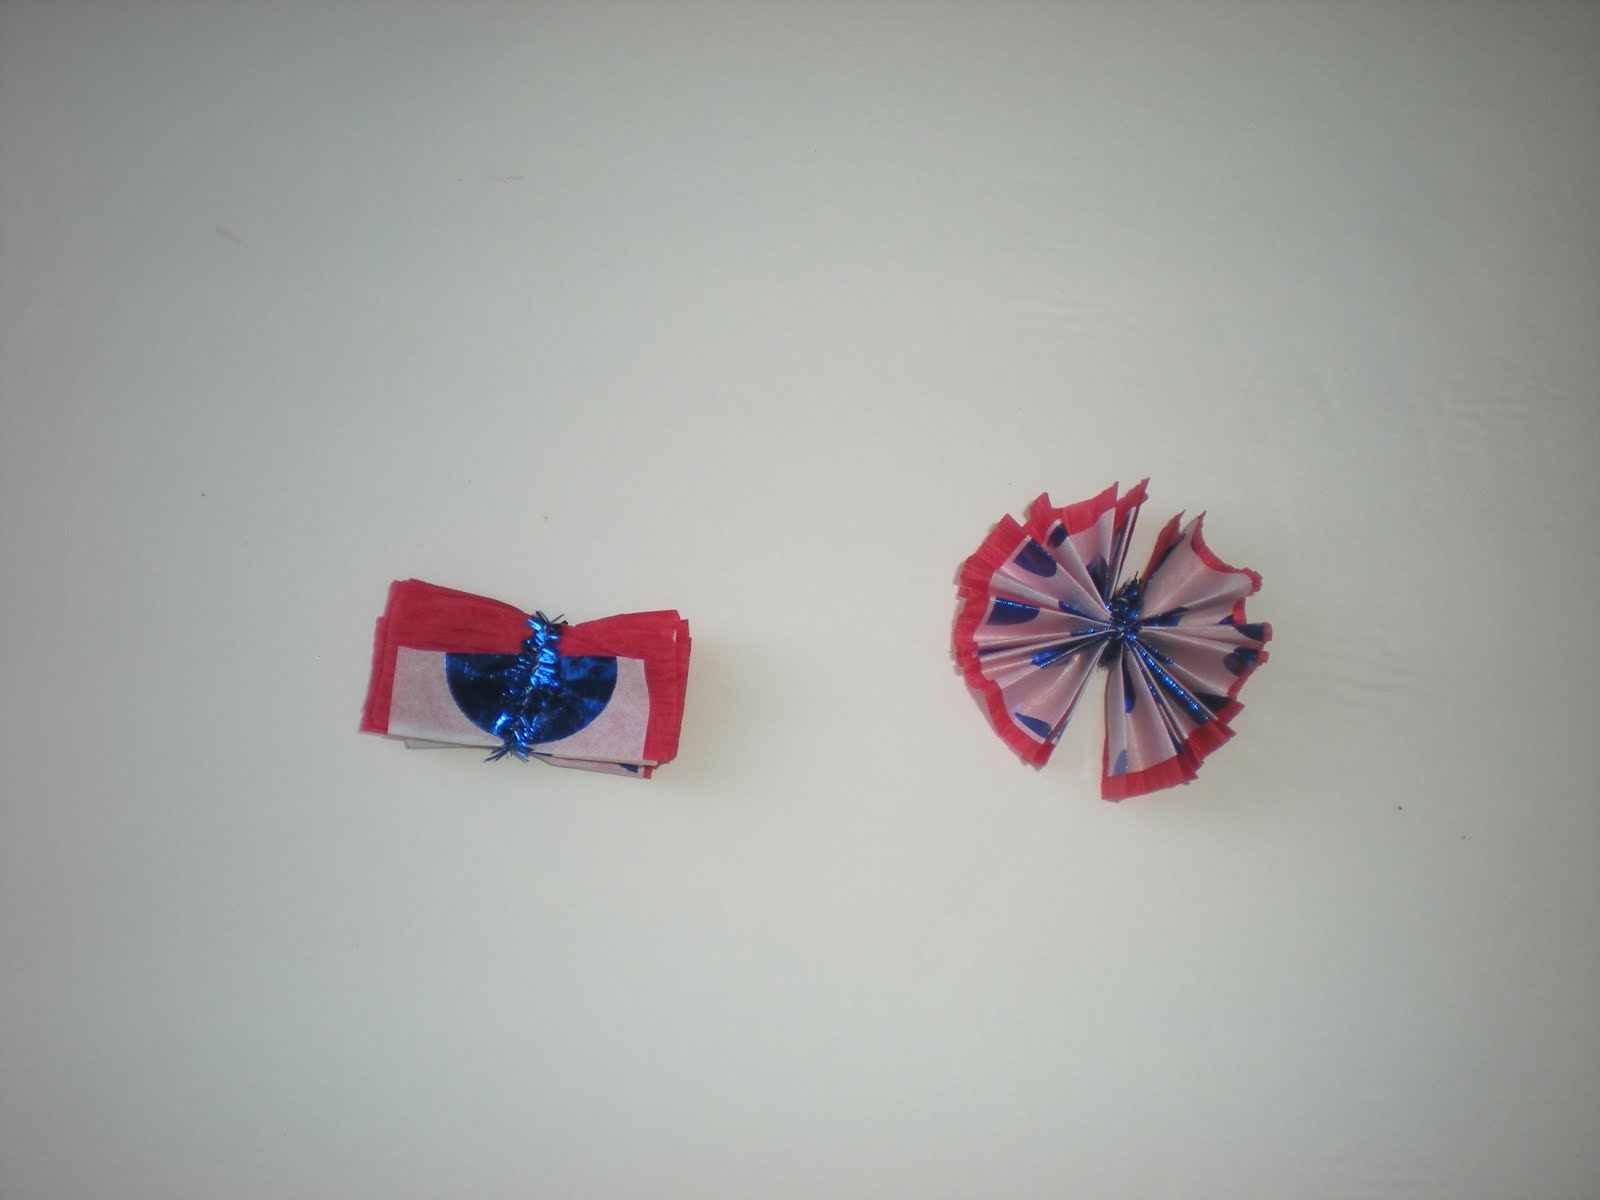
And of course for a car trip, I don't want to be juggling a dozen different craft supplies, which makes this craft a winner. Three (cheap!) materials needed:  a roll of crepe paper streamer, tissue paper and pipe cleaners.


Cut a length of the streamer that will be the background piece, about 9 inches. Then cut a strip of the tissue paper in the same length, but slightly more narrow so that the red will show on either side of the tissue.


Fold the two strips together, accordian style for the length of the two strips. Pinch in the middle and twist an inch or two of the pipe cleaner around the center. Finally, fan out the folds so that the edges of the top and bottom meet on each side to form a circle.


You may want to use glue dots or a glue stick to keep the rosette open, but if you don't mind your rosettes not being a perfect circle, then you're done!

My thanks to Tricia at Oh So Crafty for the inspiration of these rosettes. She linked her rosettes together to hang as a 4th of July banner. I just made a big bunch and scattered them around the table like confetti.

Also, hers were assembled with 3 strips of material (yay, a fellow recycler!) trimmed with pinking shears, but I took a shortcut with a tissue paper that had a white background and blue foil circles.


Thursday, June 3, 2010

Hip, Hip, Hula Hoops - Hooray!

Our county library has a great children's program, and this week they threw a "Beach Party Kick Off" to introduce this year's summer reading program. Regrettably, I did not have my camera with me to document the librarians in floral leis and grass skirts hula hooping to a Beach Boys CD.

After enjoying this exhibition, I figured it was the perfect time to get the girls a couple hula hoops, but I was not in the mood to shell out $10-15 for a couple plastic circles at Toys R Us. So I checked out my trusty Dollar Tree which has a giagantic luau/summer party section featured this month.

I was not disappointed: Hula hoops for a dollar. And not some flimsy cheapo hula hoops. They even have those ball bearings inside that make the fun swish sound as it rotates. Yay!

My six year old had a style all her own. I have NEVER seen anyone take her approach, and with seven grown nieces and nephews and a few years in childcare, I've been around a lot of little ones. Big fan of originality. Take a peek: http://www.youtube.com/watch?v=Ik3Opn3BlYo

They were actively playing with their hula hoops for close to an hour. They even broke a sweat! If the hippy spinning of your hula hoop is too monotonous, you could also try to
  • Flip it up and over your head to use it like a jump rope.
  • Throw it in the air (baton style) and try to catch it on your arm.
  • Stand it up on its edge vertically and roll it, like they did in olden days. See whose goes the furthest.
  • Lay it on the ground and have a toss game, making your kid(s) take a step away from it after each successful throw.
OR

You can spin it around your neck, the way my 4 year old mastered. How do you hula hoop?

Sunday, March 28, 2010

Balloon Bubble Bath

I found a quick way to entertain the girls today. I blew up a ton of balloons (less than 100, because there are still some left in the package) and filled up an empty laundry basket. Then they dove right in!


For added fun, we tried to stick them on from head to toe (fleece jackets helped a lot in this department). And we had a balloon 'snowball fight'. Not bad for about 65 cents worth of balloons!


Tuesday, February 9, 2010

Valentine Crafts Under $1

And the crafting continues...


I cut a bunch of heart stamps from mega-pack of sponges purchased at Dollar Tree. The girls loved making their own designs with them.


They even enjoyed cutting up the scrap pieces of sponge. A different texture for them to cut through, so a hand skill as well!


Another fun and nearly free painting idea, brought to my attention by Kim over at 4 Krazy Kings, is to take toilet paper tubes and bend them to make a heart shape, then use as a stamper. She has TONS of crafts to make with toilet paper tubes. Check 'em out: http://4crazykings.blogspot.com/2010/02/weekend-recap-making-crayons-crazy.html


To jazz up the newly painted hearts, why not fill them in with some Valentine stickers like my 4- year-old did?