Showing posts with label Paper Crafts. Show all posts

Friday, May 6, 2011

Mother's Day Ribbon Banner

If you know me at all, you know that my favorite crafts take just a few "ingredients". This one calls for a couple sheets of accent scrapbook paper, 3 sheets of colored cardstock (or less), a coordinated ribbon (I prefer grosgrain), a 3 inch circle punch, 2 inch scalloped circle punch, double sided tape, a stapler and a computer printer.

My accent paper is Sandylion/Disney 'Mini Flowers' design (RMDWSCB83, the same I used for my Paper Pyramid favors). For the cardstock, I chose bright pink, peach and yellow. Then I printed the letters of "Happy Mother's Day" on all three sheets, using capital letters in the Diamond font at font size 54. Don't forget to add an apostrophe after the letter 'R'!

The 3 inch accent circles get stapled to the ribbon, then the cardstock circles attach to the 3 inch circles with double sided tape, covering the staple.

The ribbon loop at the top of the hanging ribbon is not a knot (hee hee). I cut a separate piece of ribbon, about 7 or 8 inches, and made a figure eight with it (stapling its center), then tucked the hanging ribbon over that staple.

Hang one in the doorway of a mom you love:
I folded my banner and tucked it inside a cardstock favor box from Dollar Tree (8/$1) and put on a few foam flower stickers to fancify it.
I leave you with my favorite quotation on motherhood, by Mildred B. Vermont:
Being a full-time mother is one of the highest salaried jobs, since the payment is pure love.


Happy Mother's Day to all you great moms out there!

Monday, June 28, 2010

July 4th Paper Rosettes

I'm always looking for a diversion when I'm in the passsenger seat during a long road trip. Sometimes I browse through a stack of magazines. Last year, I made these pinwheels in the car on the way to our Fourth of July beach destination.

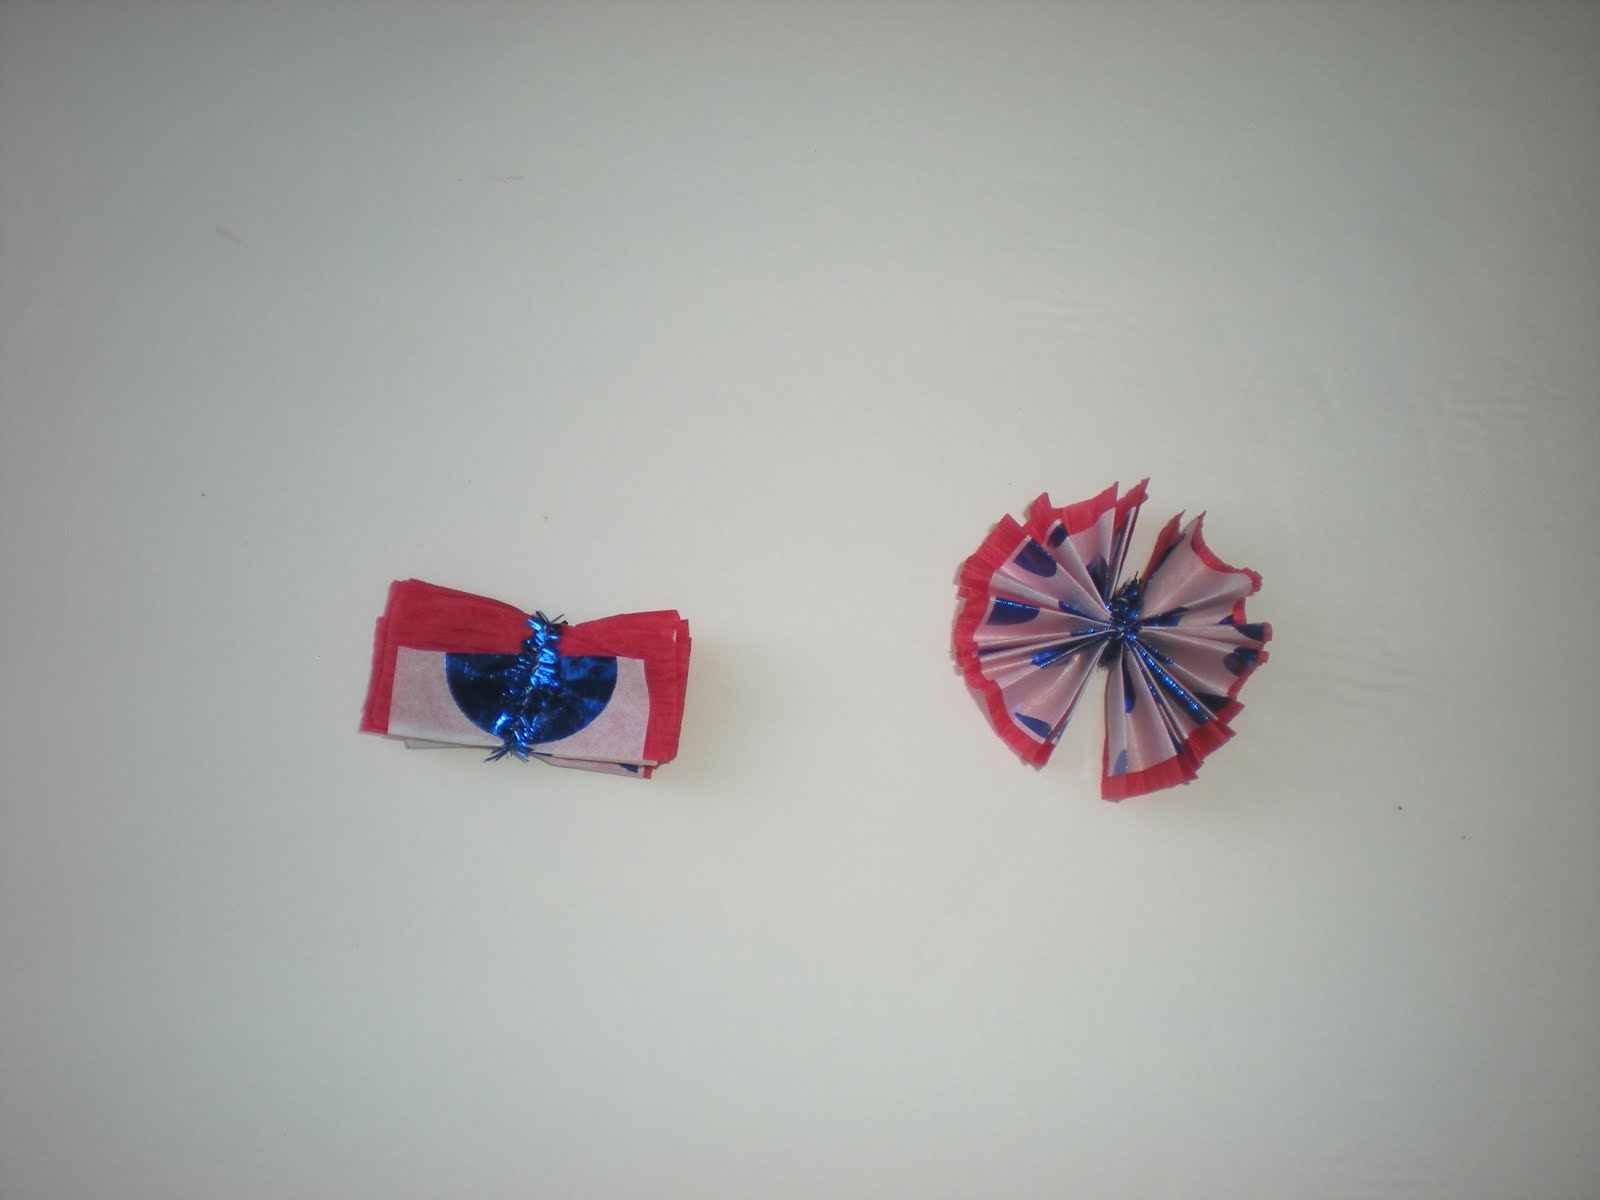
And of course for a car trip, I don't want to be juggling a dozen different craft supplies, which makes this craft a winner. Three (cheap!) materials needed:  a roll of crepe paper streamer, tissue paper and pipe cleaners.


Cut a length of the streamer that will be the background piece, about 9 inches. Then cut a strip of the tissue paper in the same length, but slightly more narrow so that the red will show on either side of the tissue.


Fold the two strips together, accordian style for the length of the two strips. Pinch in the middle and twist an inch or two of the pipe cleaner around the center. Finally, fan out the folds so that the edges of the top and bottom meet on each side to form a circle.


You may want to use glue dots or a glue stick to keep the rosette open, but if you don't mind your rosettes not being a perfect circle, then you're done!

My thanks to Tricia at Oh So Crafty for the inspiration of these rosettes. She linked her rosettes together to hang as a 4th of July banner. I just made a big bunch and scattered them around the table like confetti.

Also, hers were assembled with 3 strips of material (yay, a fellow recycler!) trimmed with pinking shears, but I took a shortcut with a tissue paper that had a white background and blue foil circles.


Monday, May 3, 2010

Super Simple Paper Pyramids

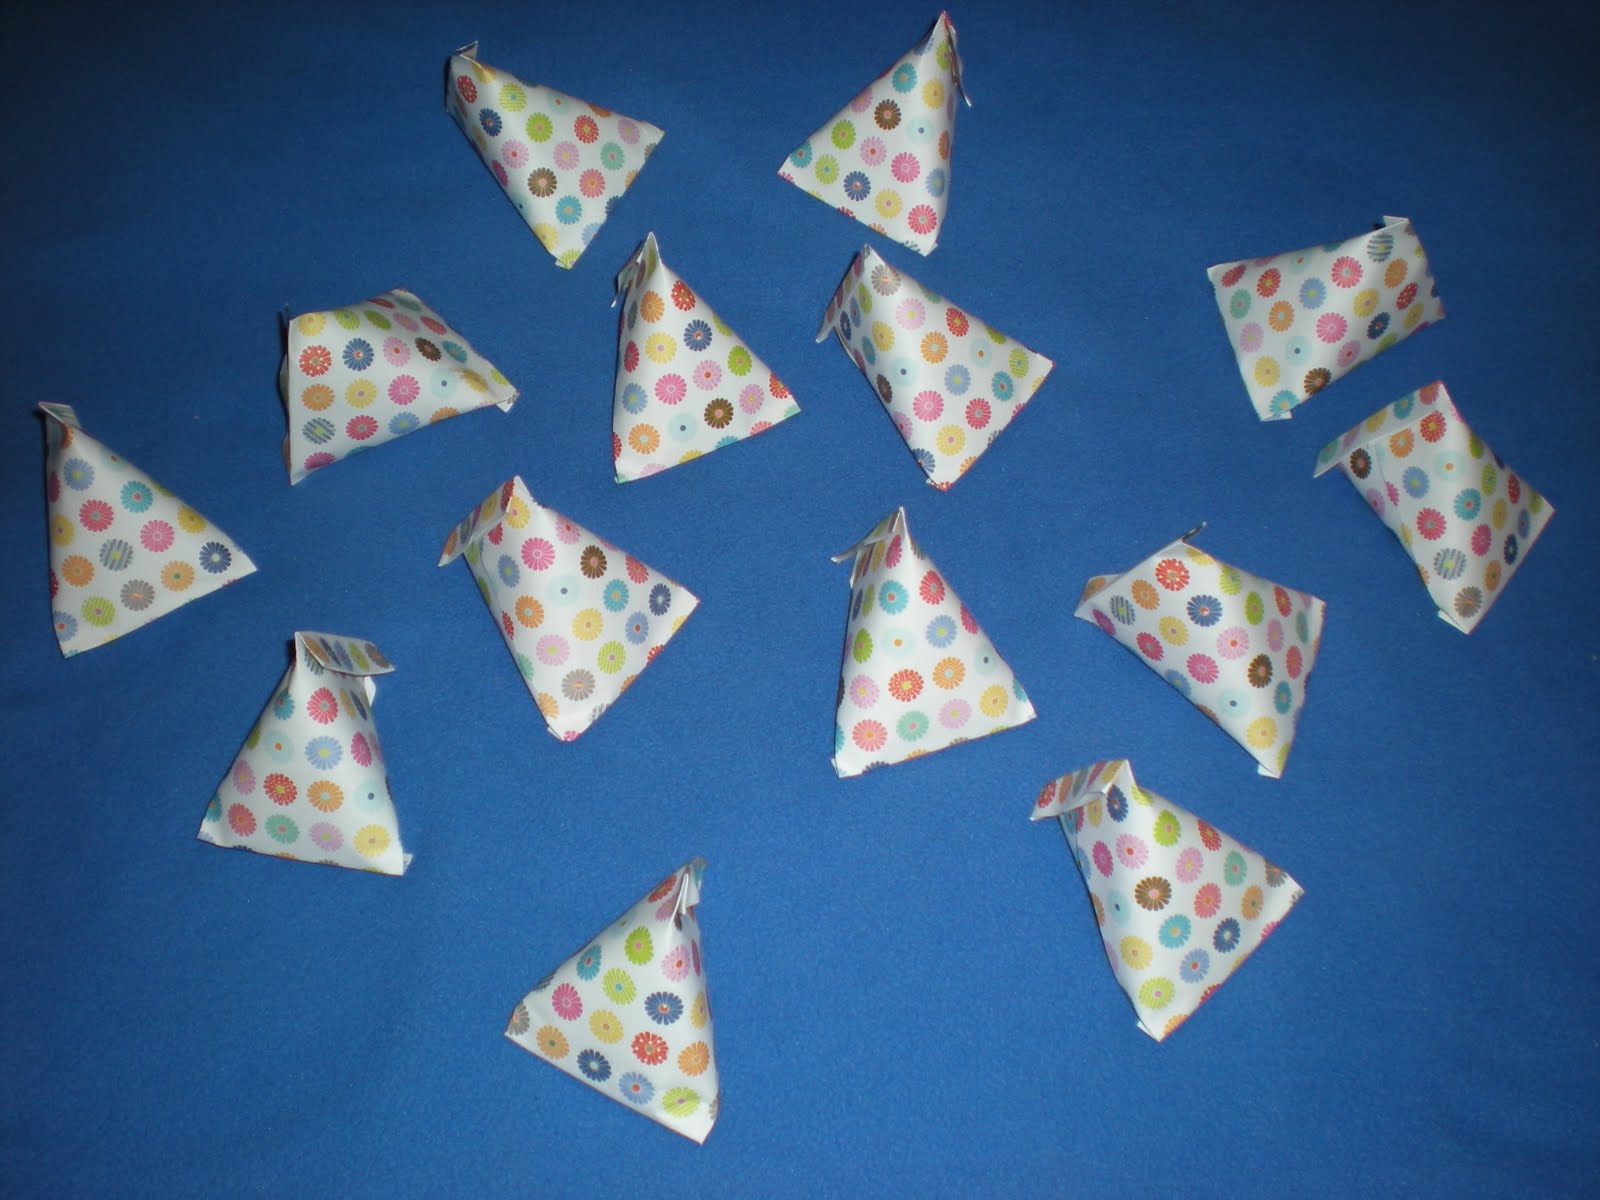
These paper pyramids are so simple. I promise! They make great table favors at any party, or because they are so inexpensive to make, you can fill a bunch and give them as gifts during Teacher Appreciation Week!
First, find a brightly decorative paper that you like. Cut into rectangles that are 4"x6". One 12"x12" square scrapbook page will make 6 pyramids.


Use double-sided tape one one of the short ends, then roll the paper up like a toilet paper tube.


LOTS of tubes to fill!!

Pinch one end and fold over to close.

Fill your pyramid with tasty treats. (This size pyramid holds 6 Hershey's Kisses.)

Next, pinch the other end, but in the reverse direction (ie, if your first side is folded over in a north-south sense, the other end will be folded in an east-west sense).

Optional embellishment: Punch a hole in one end's fold. Cut a piece of ribbon 6-7" in a coordinated color.
Pull both ends throught the hole, then pull the two loose ends throught the loop you created to keep it in place. Voila!

Monday, April 12, 2010

Today's Inspiration II: Paper Coasters

In keeping with April's green goals to avoid buying new craft supplies, I decided I needed to de-shelve an idea 'from the vault' and turn a green inspiration into reality.

Thankfully in the last week I had come across Jessica Jones' recycled magazine coasters (here) that only require 6 pages from a magazine. And I do have magazines around (believe it or not!), just right for the job.


Trust me, you want to use her tutorial for the instructions. It's not quite origami, but you do have to make multi-step folds. The six starter pages are halved, making 12 rectangles. Those twelve rectangles are folded in half, then into thirds, and they will eventually look like these 12 Vs.


The Vs are woven together, like a double-sided pie crust. Six down and six to go...


Unlike Jessica's instructions, I did not cut any of my loose ends. For instance, the tab that's bent up in the photo below, I refolded back under the square with the red checks. For some of the ends that were edges, I tucked back into the center itself.


I tried to expose the most colorful sides of the paper on the topside of the coaster. The underside, seen above, is practically all typeset. If I were to make more of these coasters in the future, I would definitely make a few dozen strips first, then match them up by color family before weaving.

So, critique of the final product. It was a moderately fun activity. Not as much fun as, say, browsing the internet for cool craft projects, but I considered it an exercise for the hands, and for the mind as well. My daughter's opinion? "You did a really good job, mom." Then she asked if she could put her drink on it. Passes the test.

Friday, March 12, 2010

Counting Down the Days 'til Dad Gets Home

My husband has a trip out of town. A BIG trip. A LONG trip. And he's not just going out of town. He's leaving the country. Fourteen days in Beijing, and 4 days in Tokyo.

To help my girls better grasp the idea of how long he'll be gone - better yet, how soon he'll be back! - I took the idea of an Advent calendar countdown paper chain and turned it into a "Countdown 'til Dad Gets Home" project. Every morning while he's away, they get to snip off one ring of the chain.
Also, to give the girls a little cultural lesson and to specify where their Dad is, each link is designated, somewhat, with the characteristics of his host country's flag:
a yellow star added to solid red cardstock for the flag of China,
a red circle centered against white for the flag of Japan,
and red, white and blue ribbons for the USA (days of his departure and arrival).


We plan on working our way to the top, and we look forward to reaching that final ring on March 31st!

Sunday, February 7, 2010

Valentine's Only One Week Away

I really enjoy Valentine's Day. A holiday centered around hearts, love, hugs, snuggles and CHOCOLATE? Come on, what's not to love?

I have hosted a Valentine's Preschooler Craft Party at my church for the past 2 years now, and thusly (yeah, I said thusly) I have a stash of Valentine craft supplies that even Cupid would envy. My original intention was to share and post 14 different Valentine's day ideas from Feb. 1-14 to jump start my blogging again, but while preparing for this year's party, I fell off the blog bandwagon again. But now I'm back!

Here's a simple 3 paneled Valentine banner I made last year. It was inspired by a Halloween "BOO" banner I had seen in a scrapbooking magazine in the Fall of '08, decked out with tons of Halloween embellishments. With time and simplicity as my two driving factors, this version is pretty tame, but you could certainly embellish to your "heart's content".

Basically, I started with 3 pieces of the darkest color paper and cut them into a pennant shape (pointed at the bottom). Then I printed "We" and "You" on a medium shade paper, and printed "Love" on the lightest shade. The three medium shade pieces were also cut to mimic the dark pennant shape, but narrower on every side, and trimmed with pinking shears at the top for a little extra contast. The lightest shade with "Love" printed on it was cut into the shape of a heart, old school style, b/c I am cw/occm (translation: because I am currently without a Cricut machine), for the center panel.

The real character of the banner comes from the 3 flowers at the bottom of the center panel. I started by gluing 3 rickrack and ribbon "stems", then attaching a 4 petal flower to the top of each one. Each flower is made of 5 hand-punched hearts (2 inches, I believe) that have been creased in half (for dimension), pin-hole punched at the bottom, and attached with a simple brad. Note: Attaching the flowers must be done before gluing the center panel to the dark pennant back or else the brad prongs will show thru the back of the piece.

Finally, I used 3-D stickers at the corners of the outer panels, and strung the 3 panels together with coordinating ribbons for hanging.

This banner was a gift for my mom, who taught me that a homemade gift is by far the best way to show someone you love them. I love you, mom.