Showing posts with label Kid Friendly Food. Show all posts

Friday, April 1, 2011

Four Basic Food Gr...What?!?

Don't you think every kid's lunch box deserves a little

PLAYDOH?

Well, they do say it's non-toxic!

Alright, folks, go check your calendar. It's April Fool's Day!


Thought it was worth a little laugh. Hope you were able to pull off a few pranks before day's end, too. 

Monday, February 21, 2011

Sugar Cookie S'mores

Shhhh...don't tell our dentist!
With temperatures in the 70s this weekend, we grilled dinner out, and then of course we needed to roast some marshmallows over the warm coals afterwards.  

Since there seemed to be some leftover Valentine sugar cookies in the kitchen (and let's face it, you know there is never a shortage of chocolate at my house), I figured what better way to use them up than to make Sugar Cookie S'mores? 
Beats a run of the mill graham cracker s'more any day. Well, at least any day that tops 70 in February!
Added bonus: Sloppy melted chocolate smooches, and a five-year-old who uses her marshmallow on a stick as a fairy wand. Introducing my little Marshmallow Fairy. The sugar intake nearly did make her airborne. 

Tuesday, January 11, 2011

Snowcation (Day One)

Well, the weathermen were right about the crippling snowstorm in the South. We had FIVE inches of snow on Monday. And if you can remember how much of a tizzy a third of an inch caused last year, you can imagine the shut down five inches of snow brings about.

To start the day off right, with just the right amount of sugar, I put together these edible snowmen.
Start with a mini powdered donut, add regular chocolate chips for the eyes, mini chocolate chips for the "coal" mouth, and a triangular slice of a marshmallow dipped in orange sugar sprinkles for the nose.
Other clever moms would have saved a handful of candy corn from Halloween for a proper nose, but I'll just have to be more diligent next year. You could also use orange m&ms if you had those around, too. 

Roads are treacherous and cars have been abandoned all over, and they are predicting that temperatures won't get above freezing until Saturday, so we'll have to wait and see if the kids make it to school at all this week. We'll make plenty of good fun with the white canvas we have outside our door. 

Wednesday, December 29, 2010

Finally: A Gingerbread House!

Yes, Virginia. There is a Santa Claus. And, yes, M&B, our gingerbread house will get done. (That is in answer to the 750 times they asked if we could make it, while I was vacuuming or preparing dinner, or when we were expecting company, or when it was 10 minutes before bedtime.) Well, the stars and the planets must have aligned last night because we were able to construct our very own edible edifice.

Step One: Open the PRE-CONSTRUCTED box of gingerbread walls made by Anna's Swedish Bakers, often found at IKEA. Ours came from Carolina Grandma.

Step Two:  Heat up the 1/4 tub of Duncan Hines frosting you were keeping on the top shelf of the fridge for just the right occasion. Pour the microwaved frosting where you need to attach walls and the rooftop.

 This step is a lot easier if you have a handsome architect on hand.

Step Three: Patience! Let the walls harden so the house doesn't implode when you try to decorate it!

Step Four: Open all the mini packages of colorful candy that mom didn't consume you saved from Halloween. Sample every package you open to make sure the gummies and m&m's are still fresh! :) 
Step Five: Have at it! Get your frosting spreaders and decorate from north to south, east to west. 


  Step Six: Smile with your sister and your finished product!


If you have no Duncan Hines frosting in your fridge or pantry, this is the halved recipe from the Domino's powdered sugar box that I used for Day 2's "mortar". (Didn't think I needed the full recipe which is supposed to be enough to frost a 2-layer cake.) I urge you to splurge on GOOD vanilla. I used Costco's Kirkland brand 100% pure Madagascar Bourbon Vanilla and the result was divine!

All it takes is 1/2 of a one pound box confectioners sugar; 1/4 cup butter; 2 Tbsp milk; 1 tsp vanilla.
Don't bother sifting the powdered sugar. It will be mixed with a hand mixer. Place all 4 ingredients in a medium bowl, then mix on LOW speed (to avoid the powdered sugar dust cloud). If the final product is too stiff, add a mini, mini, mini splash of milk from a teaspoon until you reach the desired consistency. But remember, you don't want the end product to be too moist, because it will take longer to harden.

Anyone else make a gingerbread house this year?

Monday, December 13, 2010

Tasty Tradition: White Chocolate Chex Mix

I like baking. I do. But the kids elbow to elbow over the oven? Not too keen. And the cleanup afterwards? No thank you. How about a DELICIOUS salty, sweet, and crunchy treat that only takes 2 bowls and the ease of a microwave? Sign me up!

I have been making this mix for at least four years. And I'll tell you why. The ingredients are not too expensive, they can all sit at room temperature, and even the youngest sous-chef can scoop the required amounts. Also, once assembled, the mix keeps really well after you make it. Not like some baked treats that start to go south a day after they come out of the oven.

First, grab a Santa hat to get in a jolly mood.

Next, print the recipe and find two bowls: one small for melting the chocolate and shortening in; the other LARGE for mixing the whole concoction without tossing it over the sides.

Then, grab your favorite aunt and start the fun!

White Chocolate Chex Mix

5 cups mini pretzels
4 cups corn chex cereal
1 cup salted peanuts
1-1/2 cups M&Ms (or Reeces pieces)
2 cups white chocolate chips (12 oz.)
1 Tbsp. shortening


In a large bowl, combine the pretzels, cereal, peanuts and M&Ms.


In a separate microwave-safe bowl, microwave the white chips and shortening for 1-2 minutes or until chips are melted, stirring every 30-45 seconds until smooth.


Pour over cereal mixture and mix quickly.


Spread onto a 15x10x1 inch baking pan lined with wax paper. Allow to cool completely, then break apart into small morsels. Store in an airtight container until ready to serve. Makes about 4 quarts.


Oh, and when I say store in an airtight container, I mean a husband-tight container, because if you make a batch tonight, you may not see any of it left tomorrow.

Sidebar: If you buy your holiday m&m's at the after-Christams prices, you can stash away the red ones and make this mix as a Valentine's gift, and you get to snack on the green ones all through January and February! Happy eating!

Saturday, October 30, 2010

Double the Cookies, Double the Fun

For today's back-to-back Halloween parties, I decided to bring a bunch of cookies. But I was not about to bake several dozen cookies from scratch. Instead, I made a set of 'Witches' Hats', like I did last year and Chocolate Drizzled Mint Cookies.

My cookie arsenal:


The Witches' Hats consist of Fudge Stripe cookies, Hershey's Kisses, and frosting tinted orange or melted orange candy melts. With the cookie upside down, dab on a bit of the orange frosting or melts, then adherre the Hershey's Kiss on top. Can't get any simpler than that!

For the Chocolate Drizzled Mint Cookies, I started with prepackaged mint cookies, drizzled them with a bit of white chocolate, then a bit of melted orange melts, and finally a tiny toss of Halloween sprinkles on top for extra color.

Final product of cookie deliciousness:


But before the orange candy melts made it to the cookie trays for their dainty decoration, they first made a detour via the piping bag to my pajamas: a nice bright orange sash across the front of my shirt, down the leg of my pants, to the top of my slipper and onto the floor. And, no, the carnage didn't stop there. There was a broad splatter on the countertop, as well as the crack between the counter and the stove, the cabinet door, and the cabinet knob. Not so dainty. It was like Amityville Horror, but with melted orange chocolate instead of blood.


All was not lost, however. There was even some melted chocolate left over to make a few tasty skulls.


The skulls made a nice addition to the tower of treats I made with gummy worm skewers winding up around a styrofoam cone topped with a creepy rubber spider.


Gruesome and tasty. Hope you've had your share of Halloween treats too!  

Tuesday, August 31, 2010

Summer Cool Down, Target style

Oh Target, My Target. How I love you so. Especially during summer clearance time. I mean it. Seriously. How can you top a Slip and Slide for $2.49?!? Obviously my girls don't think you can.


(We learned pretty quickly that we had to move said Slip and Slide from a level area to an area with a downward slope. Phew! That saved a lot of energy previously spent dragging them down to the end. My arm muscles were still sore the next day.) 

Then to add applause to admiration (my own saying that's the reverse of 'adding insult to injury'), I also scored a Sunbeam 1 qt. canister ice cream maker for $12.50!


The girls were ready to bring it home and start making ice cream right away. Of course I had to explain to them that the canister had to set up in the freezer for 24 hours.

That gave me time to gather all the ingredients for this recipe:
Chocolate Chip Mint Ice Cream
(yes, I know it's 'backwards', but that's what my daughters call it)

2 cups 2% milk
2 cups heavy cream
1 cup sugar
1/2 teaspoon salt
1 teaspoon vanilla extract
1 teaspoon peppermint extract
3 drops green food coloring (optional)
1 cup miniature semisweet chocolate chips

1. In a large bowl, stir together the milk, cream, sugar, salt, vanilla extract and peppermint extract until the sugar has dissolved. Color to your liking with the green food coloring.

2. Pour the mixture into an ice cream maker, and freeze according to the manufacturer's instructions. After about 10 minutes into the freezing, add the chocolate chips. After the ice cream has thickened, about 30 minutes later, spoon into a container, and freeze for 2 hours.

It really helps to prechill the ice cream mixture (actually pre-freeze for 20or 30 minutes) before pouring into the canister. Room temperature ingredients are tough to solidify!

And did I mention that the Target ice cream cones were .92 cents?!
~Bliss!~


Wednesday, March 17, 2010

Taste a Rainbow

Have you ever wondered what a rainbow tastes like? Now you can find out.

Just be prepared to spend a lot of quality time with your Pyrex measuring cup, because you'll be using it over and over as each layer needs to be prepared and allowed to set up individually.

First, gather up all the flavors of your rainbow. Mine was a sort of Franken-jello assortment.
Then choose a CLEAR vessel for your jello rainbow to take form. You definitely want to be able to SEE the layers if you are going to go through the trouble of creating them. I chose 'Clear Cut Crystal' cups from Chinet, but the mega-rainbow in a trifle bowl I saw today on 4 Crazy Kings is perfect for a large group (and less toil in the kitchen), not to mention a show-stopping centerpiece on anyone's St. Patrick's Day dessert table. Find it here:
After blending color #1 in the first cups of boiling water and cool water, pour the first color evenly amongst the cups. I started with blue at the bottom, and worked my way up to red. Allow to set up (at least one hour) in the refrigerator. Then repeat with the remaining jello mixes. To speed up the solidifying process a bit, add ice cold water (minus the ice) for the additional cup, not just cold water from the tap.

One point I picked up from another blogger was that her red and orange layers bled so closely in color that she was not able to tell them apart. So to set my red apart, I added a few drops of red food coloring before pouring to make sure the red was deep and vibrant.

When all the layers are set and all your little leprechauns are ready for dessert, top each cup with a big whipped cream cloud and for a wee bit of extra charm, tuck in a chocolate gold coin. As an alternative, for those with milk allergies or lactose-intolerance issues, you can use mini marshmallows or Fluff to top your rainbows instead.

FYI: These five boxes of jello mix filled nine 9 oz. cups to the BRIM. I am sure you could fill ten if need be, but the layers would be thinner of course.

Tuesday, March 2, 2010

Wet Snow = Indoor Time

A new (half) blanket of the white stuff came to Georgia again today. It stuck on the grass, rooftops, and parked cars, but not much else.


There were several hours of rain before the snow arrived, so even the snow that accumulated was too wet to play in. My two little ones are a bit under the weather anyway, so we took advantage of our time indoors and read some of our favorite snow-themed books.

Snow, by Nancy Elizabeth Wallace
A quick read and appeals to anyone with a deep, nostalgic appreciation of snow (it spans a generation of snow-appreciating rabbits):
The Snowflake Sisters, by J. Patrick Lewis
Twin sister snowflakes, Crystal and Ivory, take in the sights of New York City. The poetry in this book has an unusal flow - in a good way - and by that, I mean if your book stash is heavy on Dr. Seuss material, you will enjoy it.


Snowballs, by Lois Ehlert
The most creative parts make up this snowman - pieces from nature, fabric/cloth from different parts of the world, and other recycled materials.


Then for lunch, I made the girls a steaming bowl of chicken noodle soup. Did I say make? Uh, between you, me and Mr. Campbell...


I have one child who is fond of soup (well, at least the carrots and 'doodles') and the other, not so much. So I always try to provide a little selection of accoutrements that they can dunk or crunch on along side their soup. Today we had biscuits, crackers and pretzels on hand, but I often offer toast triangles, croutons or Goldfish.

Maybe your kids would enjoy corn chips, bagel rounds, itty bitty pita triangles or Shirley Temple's favorite - animal crackers. Another must: be sure to add an ice cube or two so they can stir their soup to their preferred temperature.

Friday, November 6, 2009

Other Things to do with Halloween Candy

Even though I LOVE candy myself, I am doing my best to teach the girls that you can have control over the massive loot and limit yourself to one piece a day. This, unfortunately, makes the enormous stash of candy seem to sit on the sidelines for weeks and weeks.


To use up the candy in different ways, I propose a "Taste Test". See if your kids can identify each candy by divvying them up into little bowls or a deconstructed egg carton. We conducted our own tasted test a couple months back and the girls made me re-enact the test for their friends over the days that followed.


Of course you can do this "Taste Test" with any sorts of food (this picture show a selection of salty, fruity and sweet items), but I'm sure that doing it with nibbles of snickers, sweet-tarts and skittles would be a lot more fun.


Blindfolds are optional. ;)


Another unorthodox use for Halloween candy I read about in Family Fun magazine is to conduct science experiments (which will melt fastest in water or in the microwave, etc.). I couldn't locate that exact article online, but they had some other cool ideas (like 'reverse trick-or-treating' and setting aside some leftovers to decorate a gingerbread house in December!):
http://familyfun.go.com/crafts/halloween-candy-overload-793376/


And lastly, my own sweet moment of the day:

Waiting in carpool line can be a balance of wait, wait, wait then rush, rush, rush. So this morning, just to be on the safe side, I asked B for a kiss "before you run out." Her response: "I'll never run out of those kisses." I sure hope not!!

Saturday, October 31, 2009

Halloween, Wet but Wonderful

Halloween 2009.


A rainy day cancelled our original plans to get together with my MOMS Club friends at an outdoor town-sponsored celebration, with a pizza and potluck gathering that has been SUCH fun in the past. Instead we had an imprompru small gethering at Stevarino's, still toting our treats to share, the "Witch's Hat Cookies" (from http://www.makelearningfun.com/).

Then at home, we worked on paper loop wreaths (idea from Ramblings of a Crazy Woman : http://jennwa.blogspot.com/2009/10/halloween-wreath.html).

And the girls' all time favorite: filling trick-or-treat bags. M told me I was too slow in tying them, and that she and her sister "were like a machine." Together they sucessfully packed 58 bags, plus we had an 'emergency bag' of Kit Kats, that DID get depleted!


At the end of their own trick-or-treating, B began taking stock: "Nerds! My favorite!"

And M made the full count: only 73 pieces this year (as opposed to over 100 last year). Again, walking the neighborhood in the rain curtailed the trick-or-treating a bit.
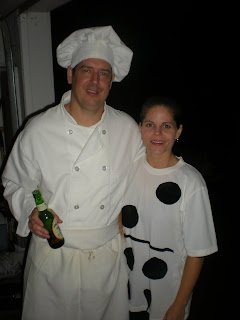
All's well that ends well. The girls were very pleased with the great fun we had, both Friday night at a neighbor's party:

and today with all the Halloween festivities. Rain be damned!